

In this post, I am going to explain what track stacks in Logic Pro X are and how you can use them in your productions.

What is a 'Track stack'?
A track stack is simply an easy way to group multiple channels to give you greater control and organisation of a group of instruments or channels.
Folder vs Summing stack
There are two types of stacks; folder stacks and summing stacks. Each has its own advantages.
What is a folder stack?
The folder stack is simply a way for you to organise your session and to keep certain channels grouped together.
When you create a folder stack in Logic, it creates and assigns a channel strip to that stack that is called the stack master.
This stack master functions the same as a VCA fader.
What is a summing stack?
The summing stack gives you the same organisational ability as a folder stack however it does not end there.
When you create a summing stack in Logic, it creates a channel strip to that stack which again is called the stack master.
This stack master functions the same as a bus.
I love summing stacks for the greater control of the group they allow.
How to create a folder stack in Logic
In the arrange window. Select the channels you want to group together. You can do this by either selecting the first channel you want to be part of the folder stack, holding down the command key and clicking (cmd+click) on all the tracks you want to be added.
( OR You can also select the first track you want to be added, hold down the shift key, and select the last track. This will then select all the tracks in between. Or simply click and drag to select multiple channels)
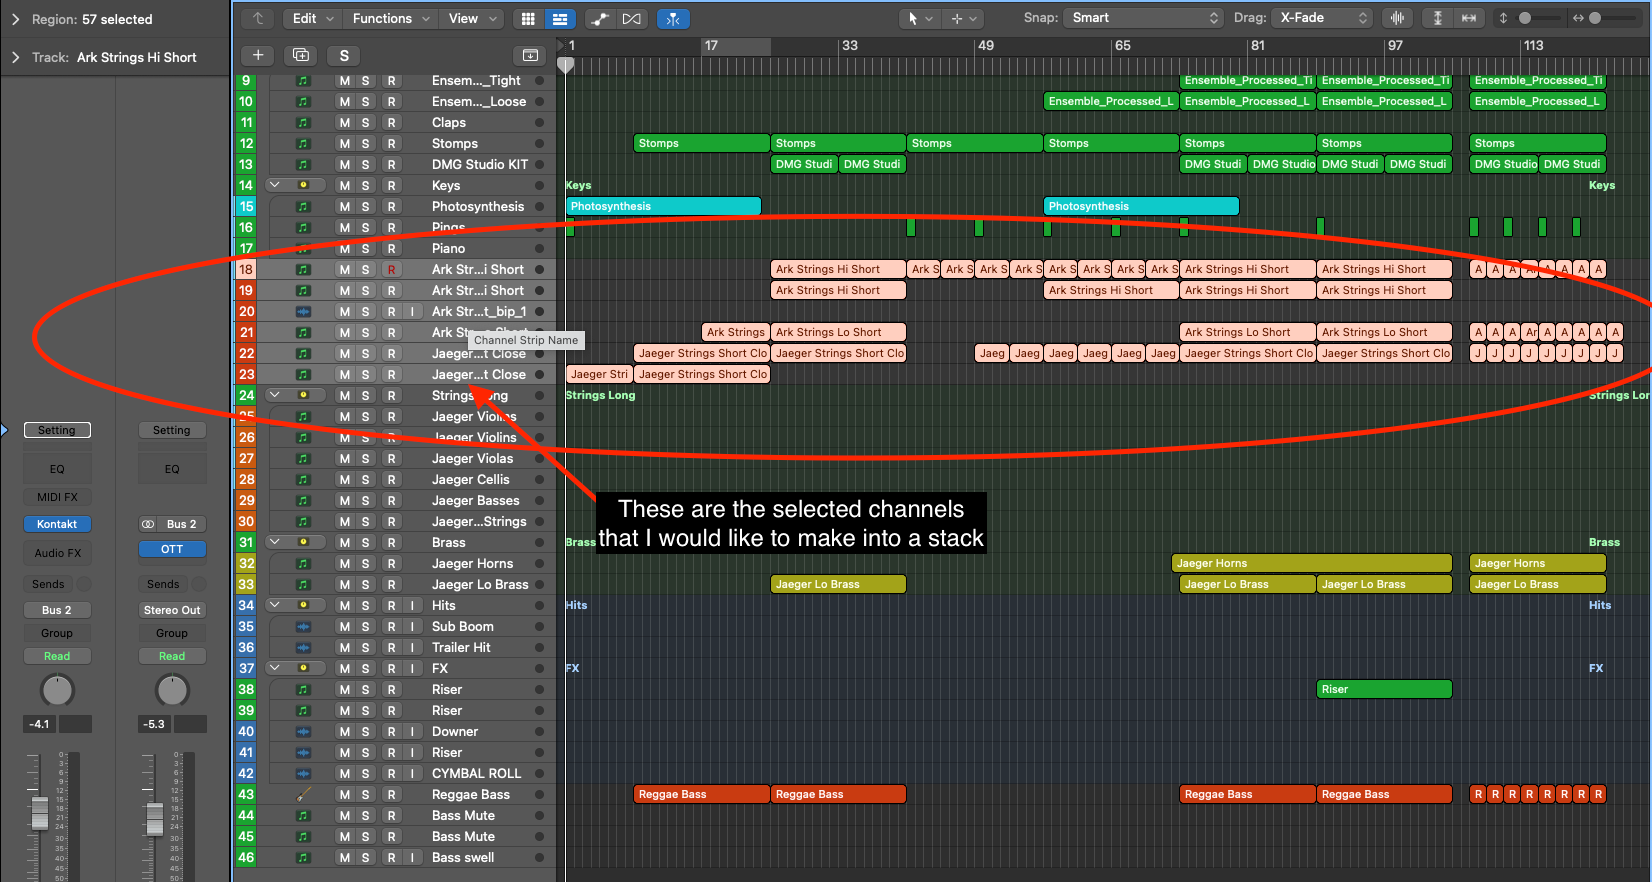
Once all the tracks you want to be added have been selected and you can see they are highlighted you can either right-click on the selected tracks to bring up the track menu.
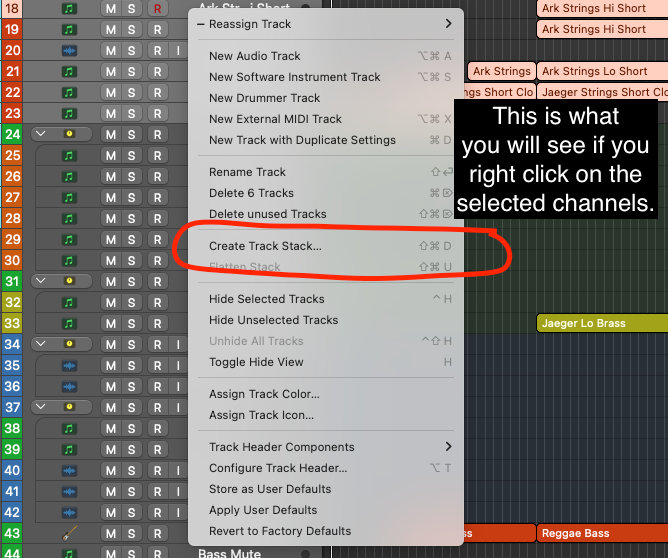
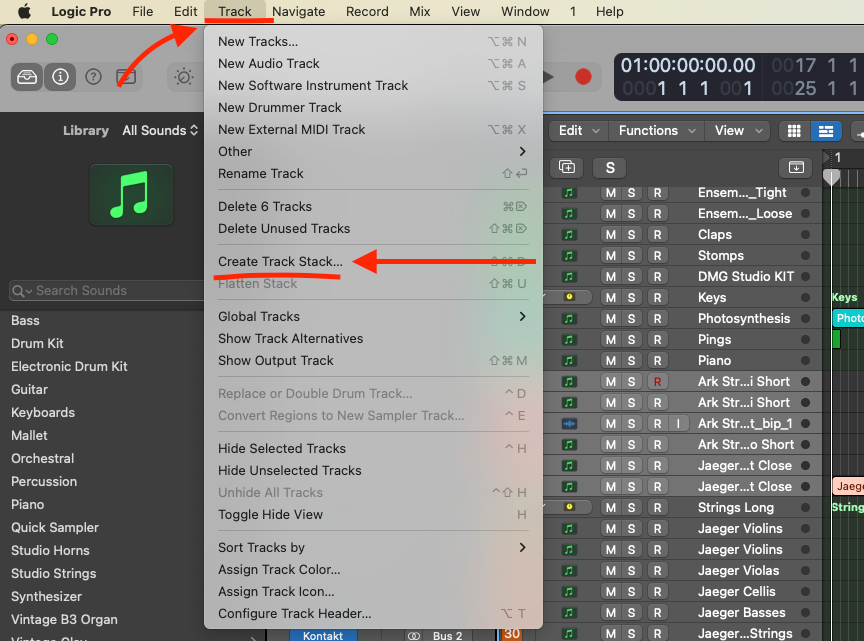
Or you can select Track from the top menu. From the Track menu, select Create Track Stack.
You will then be given the option to create a Folder stack or a Summing stack.
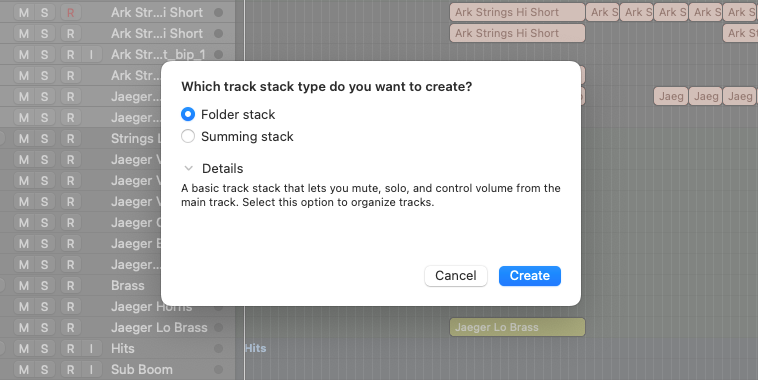
Choose Folder Stack and you have created a folder stack in Logic. Yay.

How to create a summing stack in Logic
In the arrange window. Select the channels you want to group together. You can do this by selecting the first channel you want to be part of the folder stack, holding down the command key and clicking on all the tracks you want to be added. Or just click and dragging over the channels you want to group.

(You can also select the first track you want to be added, hold down the shift key, and select the last track. This will then select all the tracks in between.)
Once all the tracks you want to be added have been selected and you can see are highlighted you can either right-click on the selected tracks to bring up the track menu and select 'Create Track Stack...'

Or you can select Track from the top menu. From the Track menu, select Create Track Stack.

You will then be given the option to create a folder stack or a summing stack.
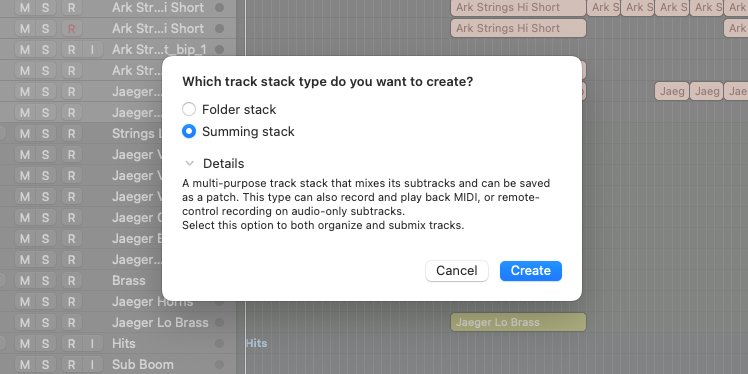
Choose Summing Stack and you have created a Summing stack in Logic. Hooray
I thought one of those cool little gifs would help show you in a nice concise way:
As you can see, the process to create both folder and summing stacks is exactly the same up to the point when you choose which type of stack you want.
How to add tracks to a track stack in Logic
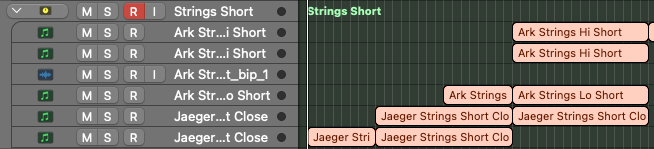
If you need to add more tracks to a track stack after you have created it all you have to do is select the channel that you wish to add and drag it into the track stack.
You will see that the channel in that arrange window appears to move into the track stack.
Make sure you drag the channel above the bottom channel in the desired track stack. This will ensure that the channel gets added to the stack correctly.
How to save track stacks as Custom Channel Strips
This is one of my favourite features in Logic Pro X.
It enables me to create instrument stems or groups and save them for future projects.
For example, let's say I create a kick-ass brass section in one track. I can then save that as a preset and then load it up quickly and easily in any future project.
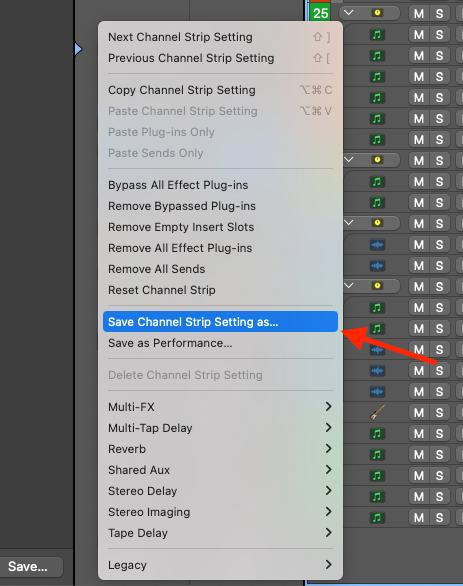
Click on the Setting button on the top of the channel strip:
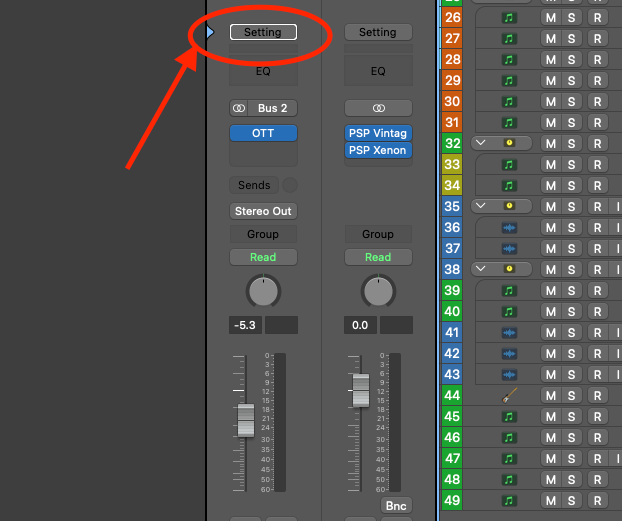
On the drop-down menu that appears, select Save Channel Strip Setting As...
From here you can choose where you want your channel strip setting to be saved.
How to Save Track Stacks as Patches
If you want to save your stack as the whole thing, effects, sends, instruments etc then you need to save it as a patch and not a channel strip setting.
The way to save your track stack as a patch is as follows:
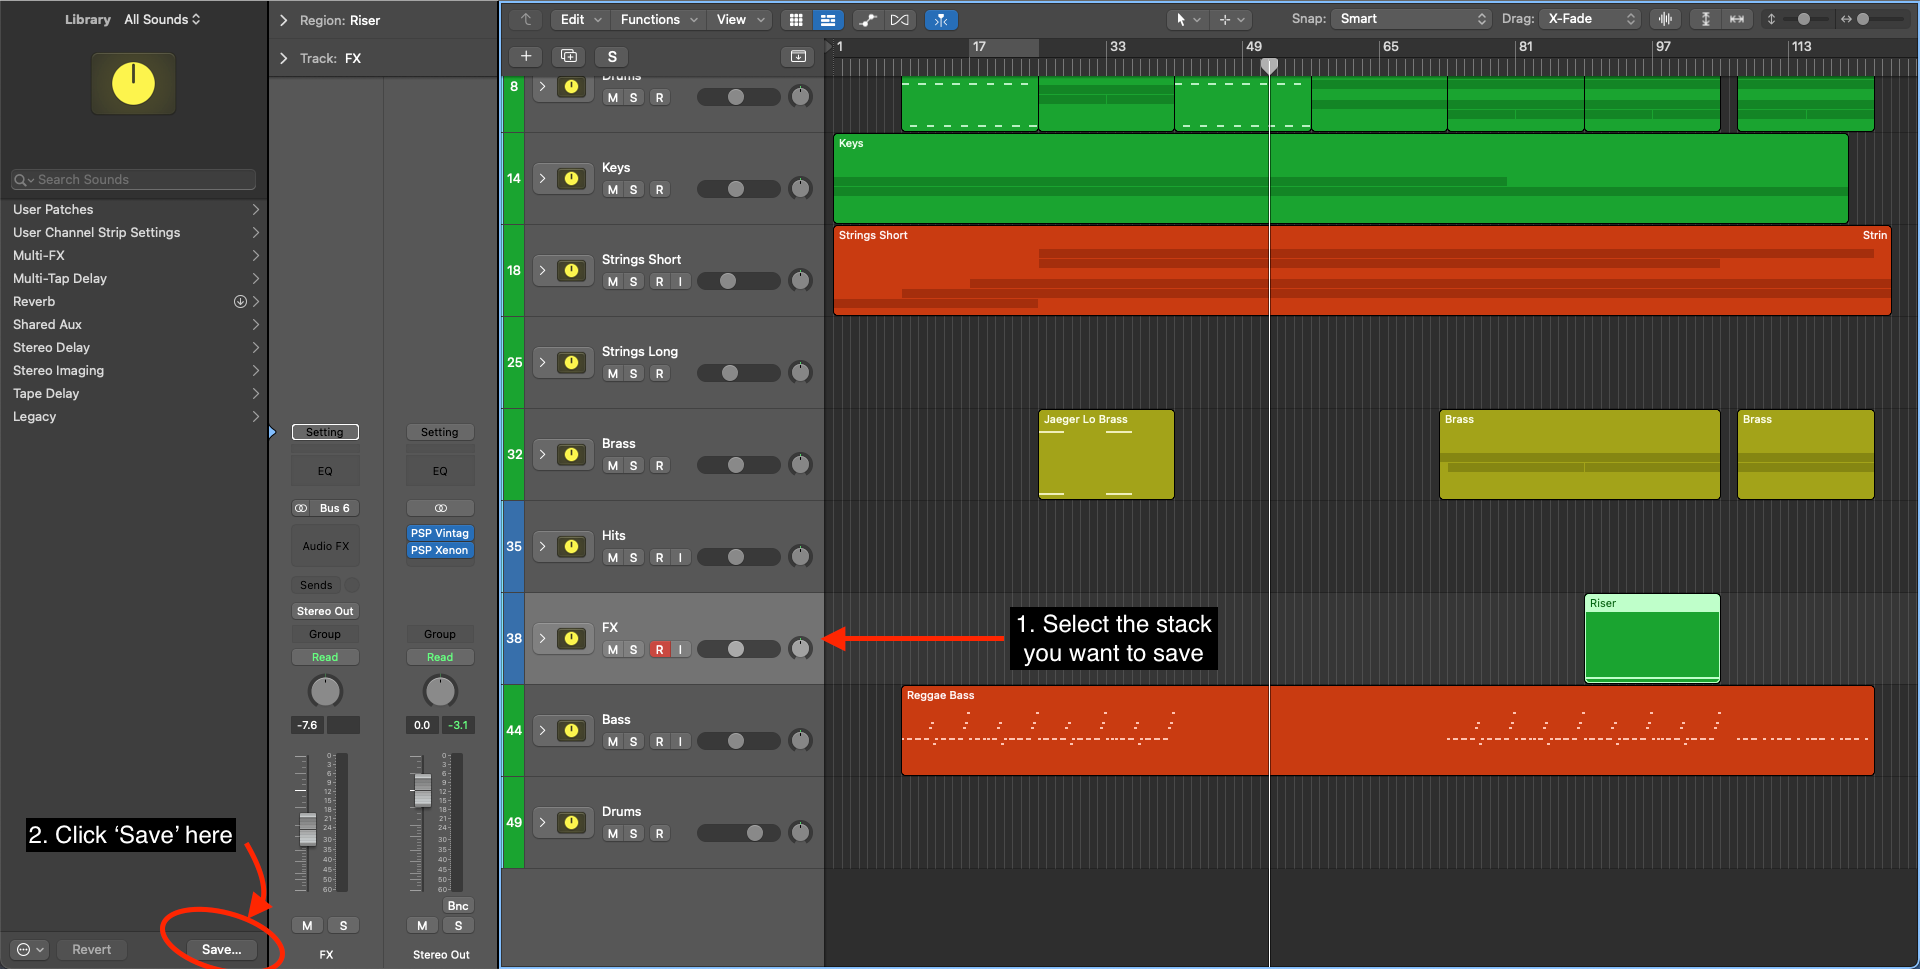
Select the stack you want to save. In the Library on the left-hand side, you will see a button at the bottom that says Save... Click that.
Making sure that you save the patch in the Instrument folder - which you will find in the Patches folder.
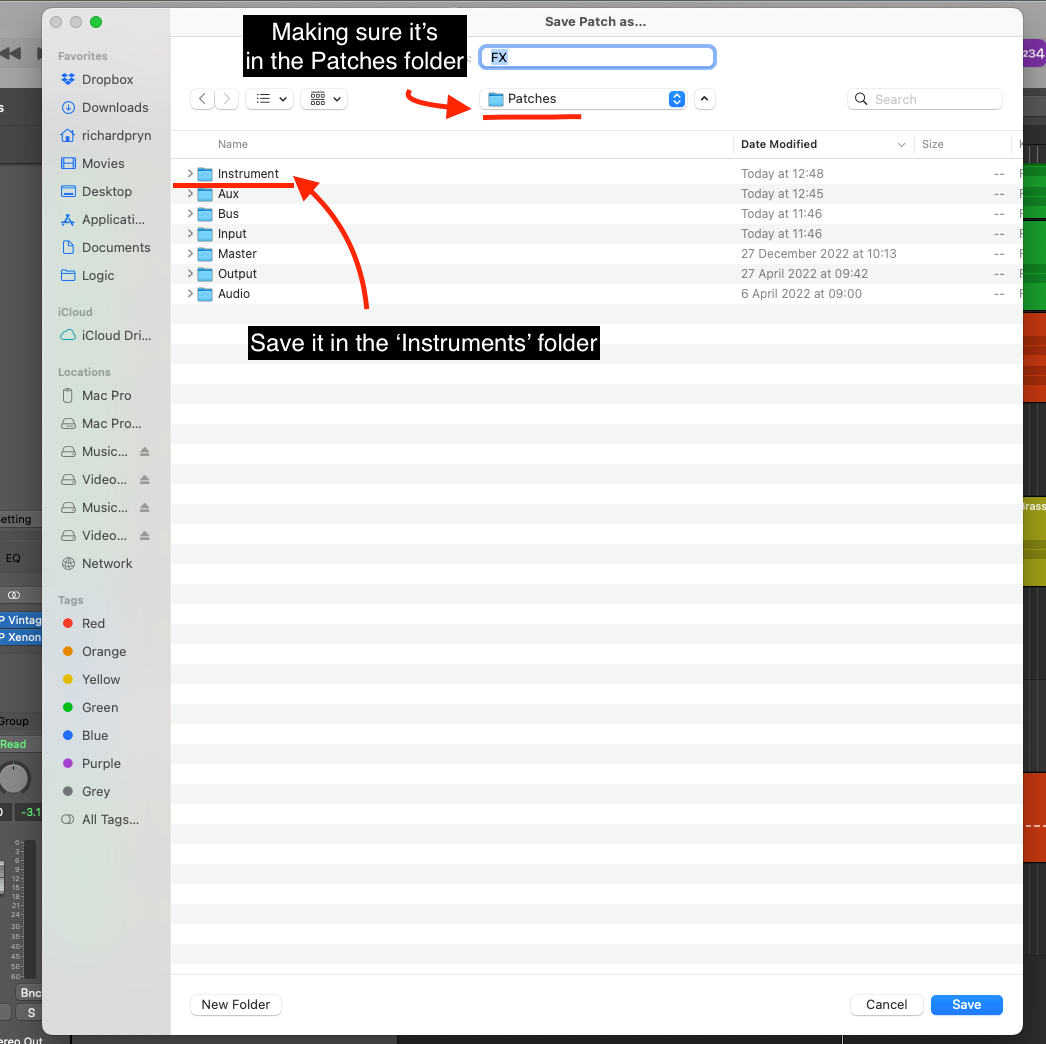
This will ensure that it will appear in the Library area of your Logic window under User Patches.
Logic Pro X Channel Strip Settings Are Missing!?
If you are having the issue that you have saved your track stack and cannot locate the channel strip setting then all you need to do is:
On the channel strip Setting button on the top of the channel, hold alt+cmd+right click and you will see this menu pop up:
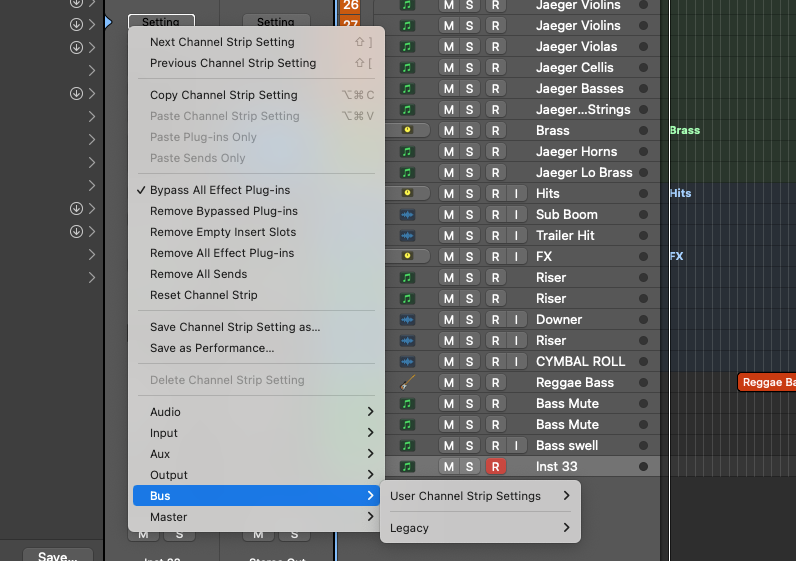
Your settings will be visible here.
Frequently Asked Questions:
Is a summing stack the same as a bus?
The main difference between a summing stack and a bus is that a summing stack gives you the ability to organise your regions and channels within the mixer and arrange windows.
What is the Summing Stack shortcut in Logic?
shift+cmd+D
🤘🏼


